Chocolate Peanut Butter Cup Pie

Recipe by Lauren Weisenthal via Serious Eats.

Ingredients:

  • 9 ounces of Oreo cookies
  • 3 tablespoons of melted unsalted butter
  • 10 ounces of heavy cream divided in half
  • 8 ounces of cream cheese room temperature
  • 4 ounces of confectioners sugar sifted
  • 1/2 teaspoon of salt
  • 12 ounces of creamy peanut butter
  • 5 ounces of dark chocolate chopped fine

Directions:

  • Crush the Oreo cookies in a food processor to fine crumbs. With processor running pour in melted butter until crumbs are evenly coated. Pour mixture into a pie plate and press the crumbs into the bottom and up the sides as evenly as possible. Refrigerate for 20 minutes to set up.

  • Whip 5 ounces of the heavy cream to soft peaks and set aside in fridge.In bowl of stand mixer whip room temperature cream cheese, confectioners sugar and salt together. Add peanut butter and continue to whip until well incorporated. Last add the previously whipped cream into the cheese/sugar/peanut butter mixture and whip together until smooth and even consistency. Pour peanut butter mixture into chilled Oreo pie shell and smooth evenly with spatula. Return pie to refrigerator and chill for 30 minutes.

  • Heat remaining 5 ounces of heavy cream until just before boiling. Pour heated cream over finely chopped 5 ounces of chocolate. Let sit for 2 minutes. Stir cream and chocolate together until smooth and silky. Pour chocolate mixture over chilled pie and smooth with spatula. Chill pie until chocolate sets 10+ minutes.

Enjoy.

Cinnamon Rolls

Cinnamon Rolls.

Ingredients: (Dough)

  • 8 oz of warm water (Lukewarm)
  • 2-1/2 teaspoons of active yeast.
  • 12-3/4 oz of all purpose flour
  • 1-1/4 oz of sugar
  • 1-1/4 teaspoon of salt
  • 5/8 oz of nonfat dry milk
  • 1-1/2 oz of instant mashed potato flakes
  • 3 oz of room temperature butter (unsalted)

Dissolve the yeast into the luke warm water and let sit for about 5-10 minutes. Meanwhile whisk together all the dry ingredients together in a bowl. I use the bowl to my stand mixer. Now pour the water/yeast mixture into the dry ingredients and also add in the room temperature butter. Mix and kneed until a smooth cohesive dough forms. I use the stand mixer with a dough hook and it take about 7 minutes. You should have the following.

Cover the bowl and let dough rise for about an hour. It will puff up and about double in volume.

Ingredients: (Filling)

  • 3 oz of granulated sugar
  • 1-1/2 tablespoon cinnamon
  • 2 teaspoons of all purpose flour
  • 2-4 tablespoons milk

In a small bowl whisk together the sugar, cinnamon, and all purpose flour. Set aside the milk.

On a lightly floured surface, roll out dough you made previously that is rising in the covered bowl. You will want to roll the dough out into a rectangle about 12″X18″. You don’t have to be precise. Just roll the dough into a rectangle about 3/8″ thick. Should look like the following.

Now take the reserved milk and brush it all over the rolled out dough. Leave about an inch space around the perimeter. You can use a pastry brush, your hand, paint roller, airless sprayer, crop duster whatever you have handy.

Now spread the sugar and cinnamon mixture on the dough. Gently using your hand level it all out. Should look like the following.

Now just roll the dough up lengthwise into one long cylindrical log. Next take a serrated knife and cut the dough in half. Then cut the two halves in half. Continue cutting each half in half until you have 16 rolls.

Place 8 of the cut cinnamon rolls into a 9″ lightly greased pie pan. Put the other 8 rolls in another lightly greased pie pan. You will have two 9″ pie pans with cinnamon rolls.

The rolls need to rise again. Notice there is plenty of space and the rolls look smallish. Don’t worry. Yeast is magic and working. These rolls need to rise about another hour to an hour and a half. The best place for this to happen is in an UNHEATED oven with the light turned on. So turn on the oven light, put these pans in the oven and check them in an hour and fifteen minutes. The rolls will rise and double in size. See?!

Once the rolls have risen and doubled in size, remove from oven. Preheat the oven to 375 degrees. Now bake the rolls for 20-25 minutes.

While the rolls bake,make the glaze.

Ingredients: (Glaze)

  • 1/2 cup confectioners sugar
  • 3-4 tablespoons of milk
  • 1-1/2 teaspoon of vanilla extract

Sift sugar into small bowl. Add milk and vanilla extract and stir well. You should end up with a smooth glaze. If its too loose, add sugar. If too thick add some milk. When its to the consistency you like, pour over the hot cinnamon rolls when they come out of the oven like below.

Cut one or ten out, and chow down. A little more work and pre-planning, but these will beat anything you buy in a tube at the grocery store. It also makes the house smell nice.


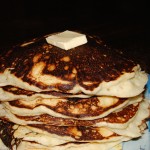
Buttermilk Pancakes

The Best Darn Buttermilk Pancakes you’ll ever make or eat.

Makes about 8-8″ pancakes or about 16-4″ pancakes.

  • 2 cups all purpose flour
  • 2 tablespoons sugar
  • 1 teaspoon baking power
  • 1/2 teaspoon baking soda
  • 1/2 teaspoon salt
  • 2 cups of buttermilk
  • 1/4 cup of sour cream
  • 2 eggs
  • 3 tablespoons of butter melted, cooled slightly
  • Vegetable oil for frying pan
  1. In a bowl mix the flour, sugar, baking powder, baking soda, and salt together to incorporate.
  2. In a second bowl mix together the buttermilk, sour cream, eggs and melted but not hot butter until combined.
  3. Combine the wet ingredients into the dry ingredients in bowl 1. Stir until combined. Batter will be lumpy, do not worry. Let batter sit on counter for about 10-15 minutes. The wet ingredients will hydrate the dry ingredients in this time. Secondly the leavening properties of the backing soda and power will kick into gear. Notice small bubbles in batter.
  4. Heat a non-stick or a finely tuned cast iron frying pan over medium heat. Pour about a tablespoon of vegetable oil in the pan. Take a couple clean wadded up paper towels and wipe the oil around in the frying pan. You want just a slight oily film in the hot pan.
  5. Check batter. It should still be thick but just loose enough to scoop and pour with a ladle or measuring cup. If batter is still a little thick add a tablespoon or two of additional buttermilk and stir to combine.
  6. Make a decision. Big or small pancakes. I go for the bigger ones myself. I am a pancake pig, about 8 inches across. I hate trying to flip a bunch of pancakes in the same frying pan. So I pour in about a 1/3-1/2 cup of batter into the pan. You want smaller pancakes decrease the batter to about 1/4 cup.
  7. Shake pan on stove slightly when you pour in the batter, it will move and flow out into the traditional round shape.
  8. Pay attention here. This is where I screw up all the time. Pancakes cook fast! You have a small window of opportunity to catch a pancake between perfect and burnt shit. Pay particular attention if using cast iron. When you pour the batter into the pan and shake the pan to flow the pancake batter into the round circle, you have about a minute to a minute and twenty seconds. You will notice the bubbles on the top of the batter appear. The outside diameter of the pancake will start to dry. Get your spatula under that pancake and loosen it from the pan and flip. You will think to yourself the center of the top of the pancake is still wet and very few bubbles it cant be ready to turn. Ignore those thoughts and logic, you’re almost too late and on your way to burnt pancakes. I make the mistake all the time. Its tricky but you’ll overcome this and get the hang of it.
  9. When the pancake is turned you have even less time. The second side of the pancake cooks even faster. You have about 30-45 seconds here.
  10. Take same paper towel you used earlier and re-wipe out the frying pan and re-coat with vegetable oil. There is probably enough oil on the paper towel from the first time you wiped the pan out so you may not need to add more. You just want a slight film of oil in pan.
  11. Repeat steps 6 to 10 and keep making pancakes till the batter is gone.

Don’t be discouraged if he first pancake is a little more done then you like. The first pancake is always a test. Your next pancakes in the batch get better and better. Everyone knows the first pancake is always for the dog anyway. Right?

You can hold the pancakes on a plate in the microwave while you cook the entire batch, or  on an oven safe plate in the oven turned to its lowest setting to keep the pancakes warm while you cook the batch or wait to eat.

These pancakes will beat anything you buy in the store that comes in a box or a plastic jug you add milk to and shake. I promise.

They are a little tricky at first they cook fast. You will get the hang of these pancakes though. Super simple.

Guys pay attention here. You screwed up, forgot her birthday, bought her a vacuum for Valentines day, told your girl she was turning into her mother. You get your ass up early and make your woman a batch of these pancakes on a Sunday or while she is still asleep. You will get that boys weekend in Vegas and the new Harley. Serious. If you make these for your girl, you have punk card credit in the bank. Granted its not a happy ending from the bimbo at the strip club get out of jail free but this gets you out of washing her car on Sunday football all season. Do it. She deserves it.